
Feature Four Page - Flask Server
Process
The Flask server is set up using the
Flask Python Web application framework and flask library. It is built on top of the
Werkzeug Web Server Gateway Interface (WSGI) toolkit and the
Jinja template engine.
It is run from a local machine i.e.: a laptop which can either serve as a Wi-Fi hotspot or be connected to a Wi-Fi dongle, to set up a local network. In both cases, there is no requirement to access the Internet, even for translation from English to Korean given a local machine translation model (MTM) is used.
The Flask server is started through a batch file i.e.: flask.bat which runs the main Python program i.e.: app.py and opens 4 MS-Edge windows in which the 4 below dashboards/pages are displayed:
@echo off
cd C:\Users\madel\Documents\RCJ\Code\Flask
start "" python app.py
echo Waiting for server to start ...
:waitloop
timeout /t 1 >nul
curl -s http://localhost:5000 >nul
if errorlevel 1 goto waitloop
echo Starting dashboards ...
start "" msedge --app=http://localhost:5000/status_dashboard --window-position=0,0 --window-size=960,540
start "" msedge --app=http://localhost:5000/security_dashboard --window-position=960,0 --window-size=960,540
start "" msedge --app=http://localhost:5000/dialogue_dashboard --window-position=0,540 --window-size=960,540
start "" msedge --app=http://localhost:5000/camera_dashboard --window-position=960,540 --window-size=960,540
A time out is required to allow the MTM to load its 2.4Gb of data.
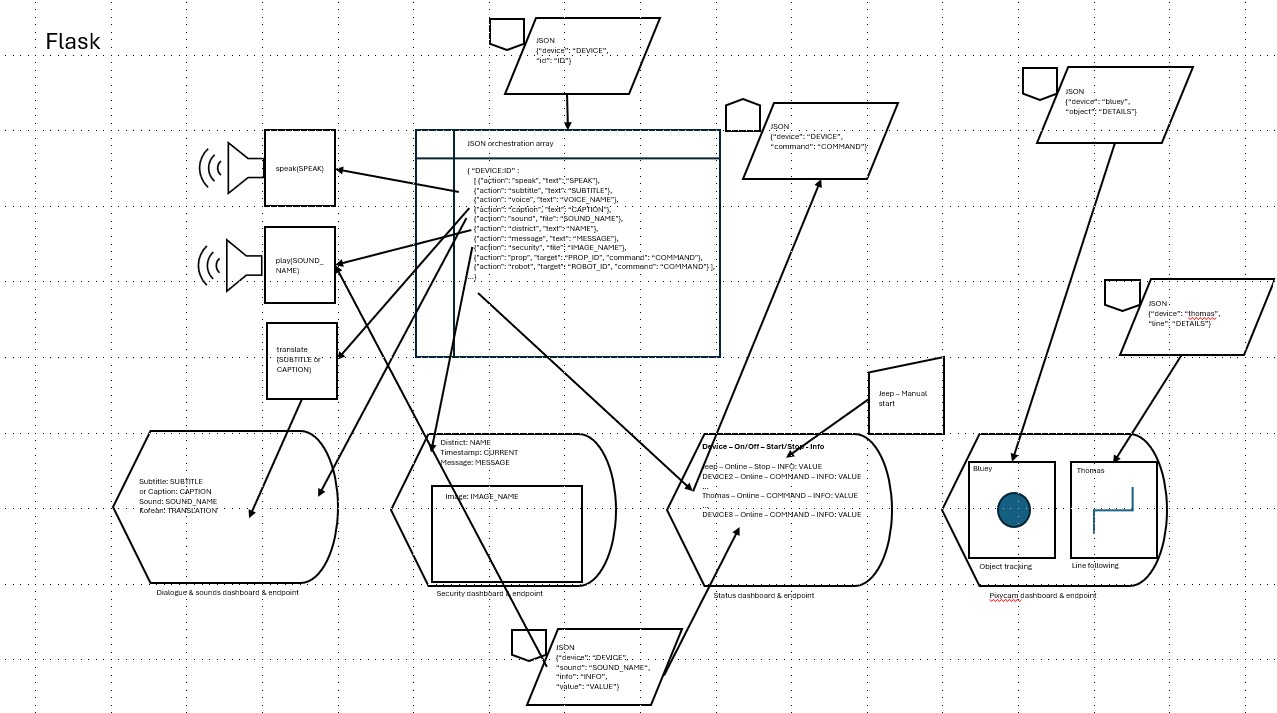
The main program in turn imports all the 'endpoints' (meaningful Universal Resource Locators [URLs] for both the devices and users), which receive data from the robots and props and sends data to the robots, and registers them as 'blueprints' (a way to organise related pieces of code). It also imports tools which are run in their own asynchronous processes:
# ---------
#  MAIN_APP
# ---------
from flask import Flask
# Import blueprints
from routes.command_routes import command_bp
from routes.dashboard_routes import dashboard_bp
from routes.dialogue_routes import dialogue_bp
from routes.event_routes import event_bp
from routes.pixy_routes import pixy_bp
from routes.sound_routes import sound_bp
from routes.status_routes import status_bp
from routes.stream_routes import stream_bp
# Import tools
from services.audio_utils import start_audio_worker
from services.bluetooth_bridge import start_ble_bridge
app = Flask(__name__)
# Register blueprints
app.register_blueprint(command_bp)
app.register_blueprint(dashboard_bp)
app.register_blueprint(dialogue_bp)
app.register_blueprint(event_bp)
app.register_blueprint(pixy_bp)
app.register_blueprint(sound_bp)
app.register_blueprint(status_bp)
app.register_blueprint(stream_bp)
# Start tools
start_audio_worker()
start_ble_bridge()
if __name__ == "__main__":
	app.run(host="0.0.0.0", port=5000, threaded=True)
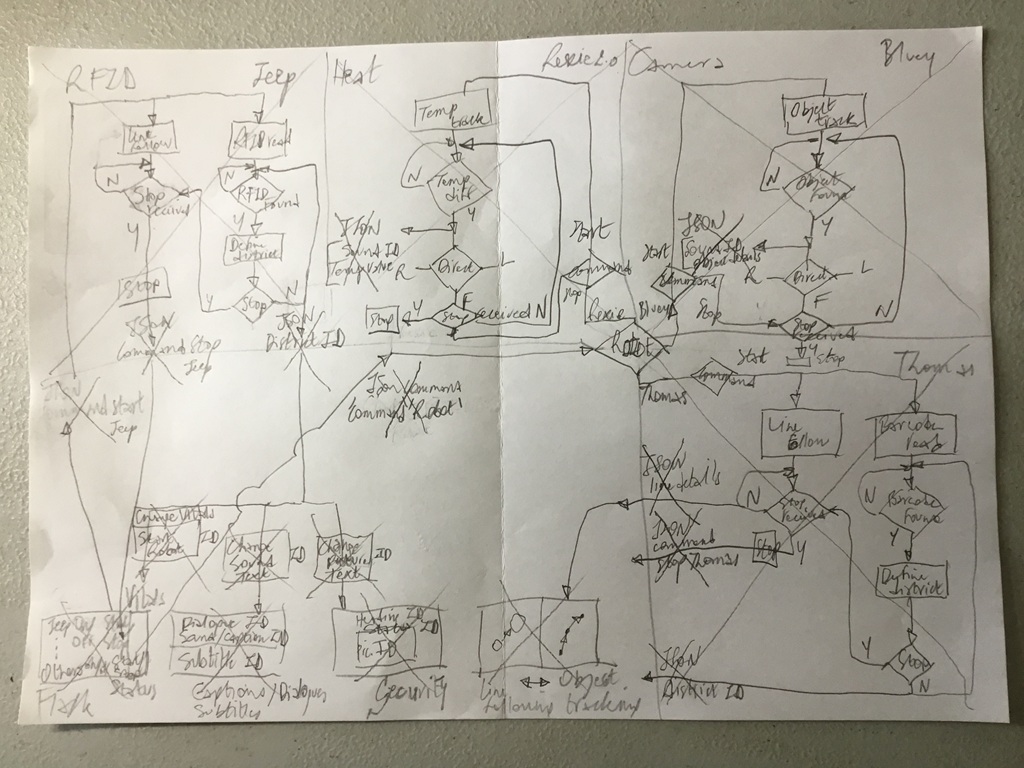
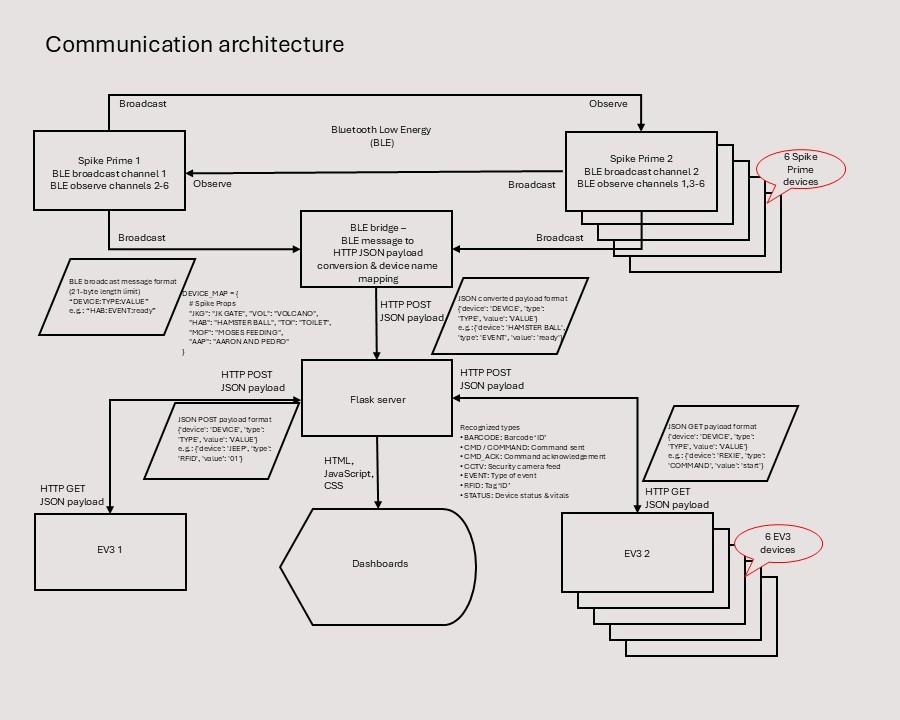
LEGO SPIKE Prime robots and props send and receive data to/from each other as well but not through the Flask server. This is a design choice due to the complexity of implementing a full-blown Bluetooth communication architecture (see below) and the shortcomings of the Bluetooth implementation in the EV3DEV Stretch operating system installed on the LEGO Mindstorms EV3 robots.
The full Flask server directory structure can be found here, and all the code (except the 'static' and 'nllb-200-600M' folders' content) is available here in a ZIP file. The content of the 'nllb-200-600M' folder can be downloaded from Hugging Face. The Python modules required on the LEGO Mindstorms EV3s are python3-flask and python3-requests or urequests. Those required on the device hosting the Flask server are bleak, flask, pillow, pyserial, pywin32, sentencepiece, torch and transformers.
Communication
Hypertext Transfer Protocol (HTTP) allows communication with LEGO Mindstorms EV3s over Wi-Fi local network in both directions i.e.: GET (receive data from the Flask server) and POST (send data to the Flask server).
Bluetooth Low Energy (BLE) allows communication via a BLE bridge with LEGO SPIKE Primes in one direction i.e.: POST.
BLE communication between LEGO SPIKE Primes occurs in both directions i.e.: broadcast on one channel (send data) and observe on complementary channels (receive data). Due to limitations in the length of message strings i.e.: 21 useable characters, a device map was set up e.g.: JKG is the 'Jurassic Kingdom Gate'. The abbreviations are then mapped back to the full name via the 'global state' Python file.
Presentation
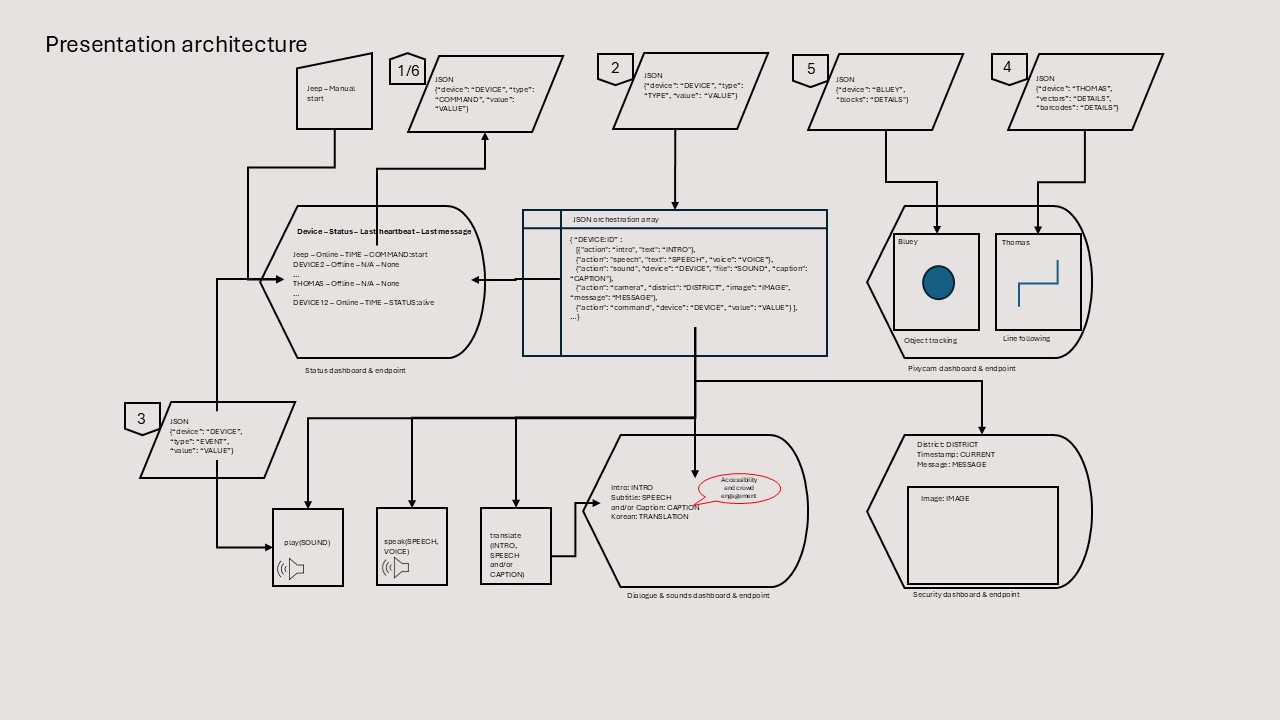
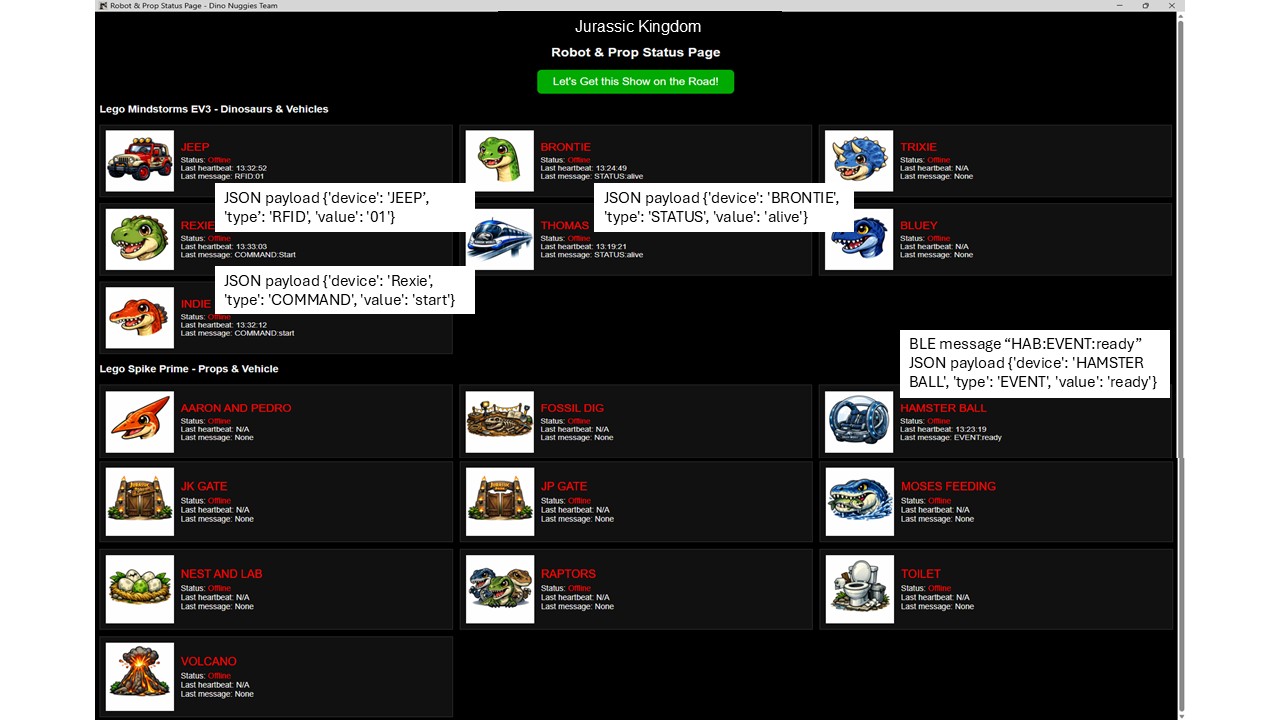
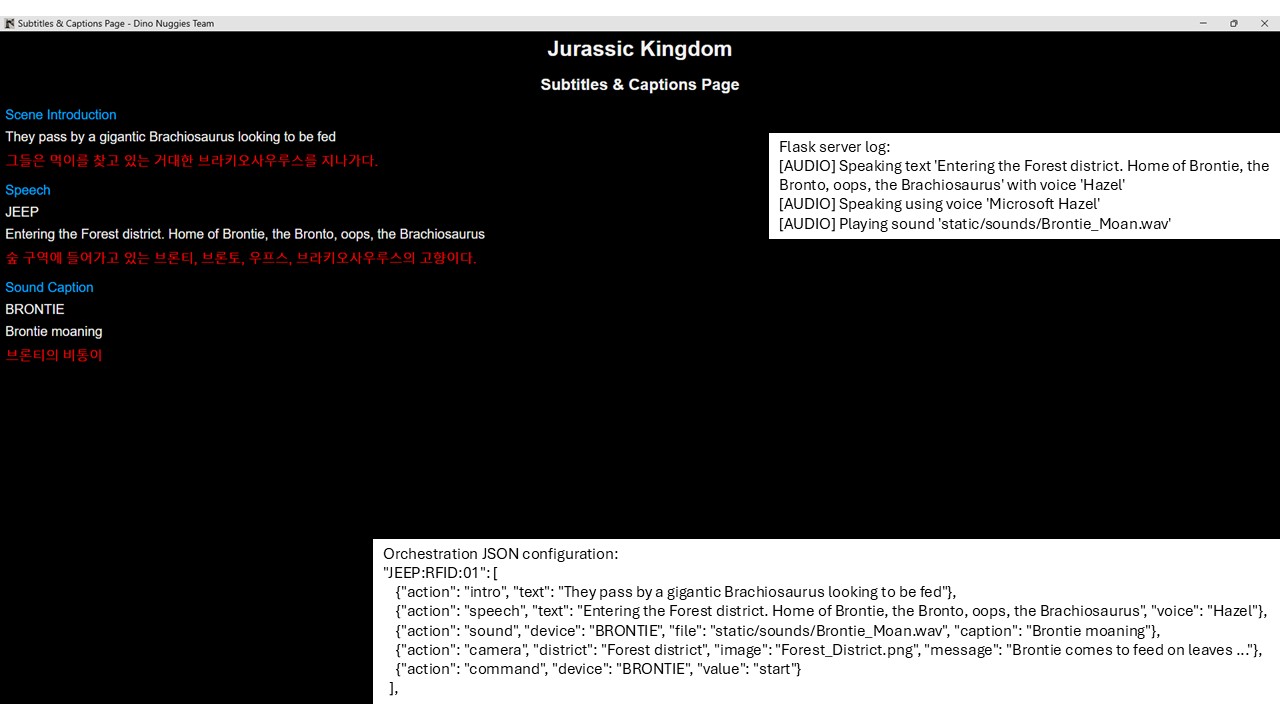
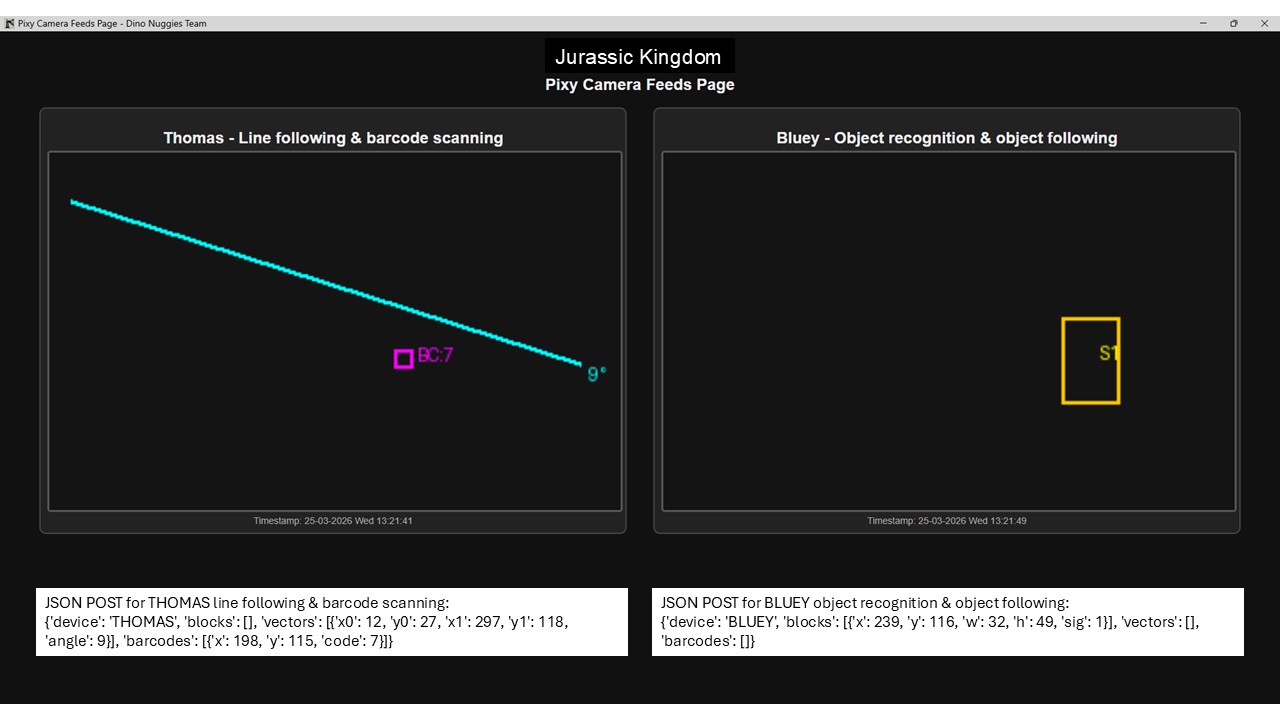
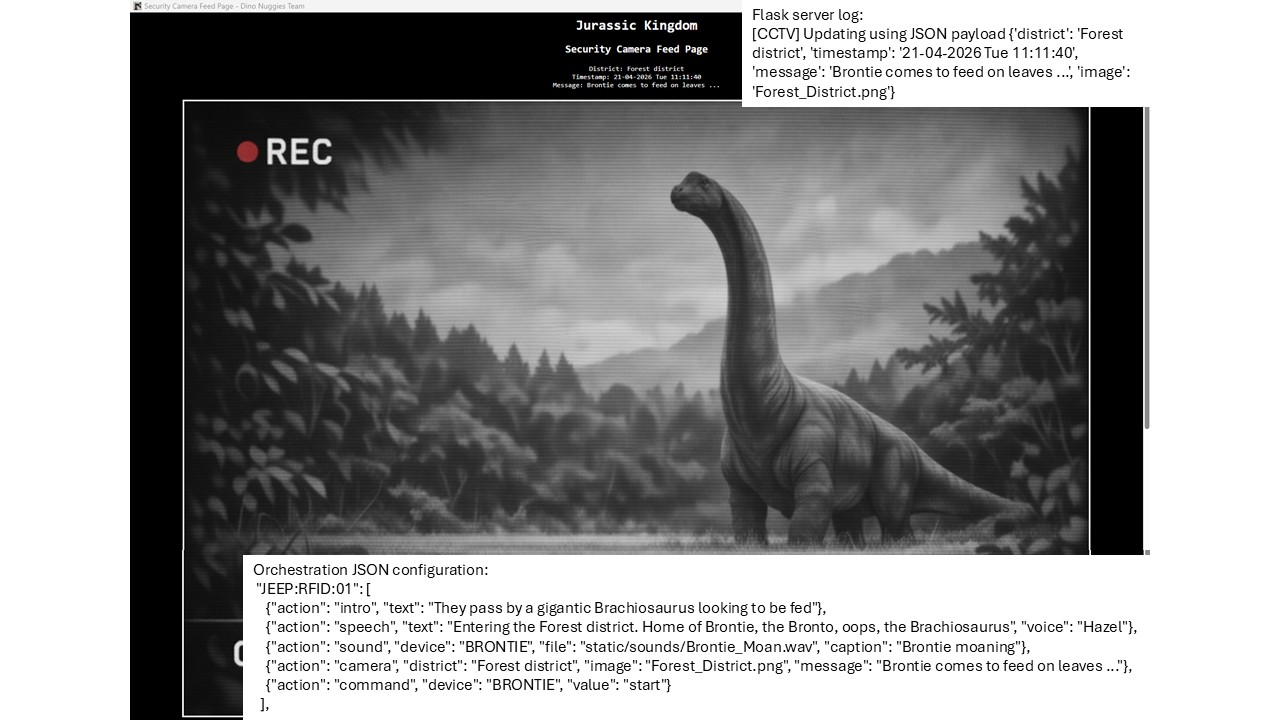
Presentation occurs via dashboards developed in Hypertext Markup Language (HTML), JavaScript and Cascading Style Sheets (CSS) displaying data sent to the Flask server. Information displayed includes: